


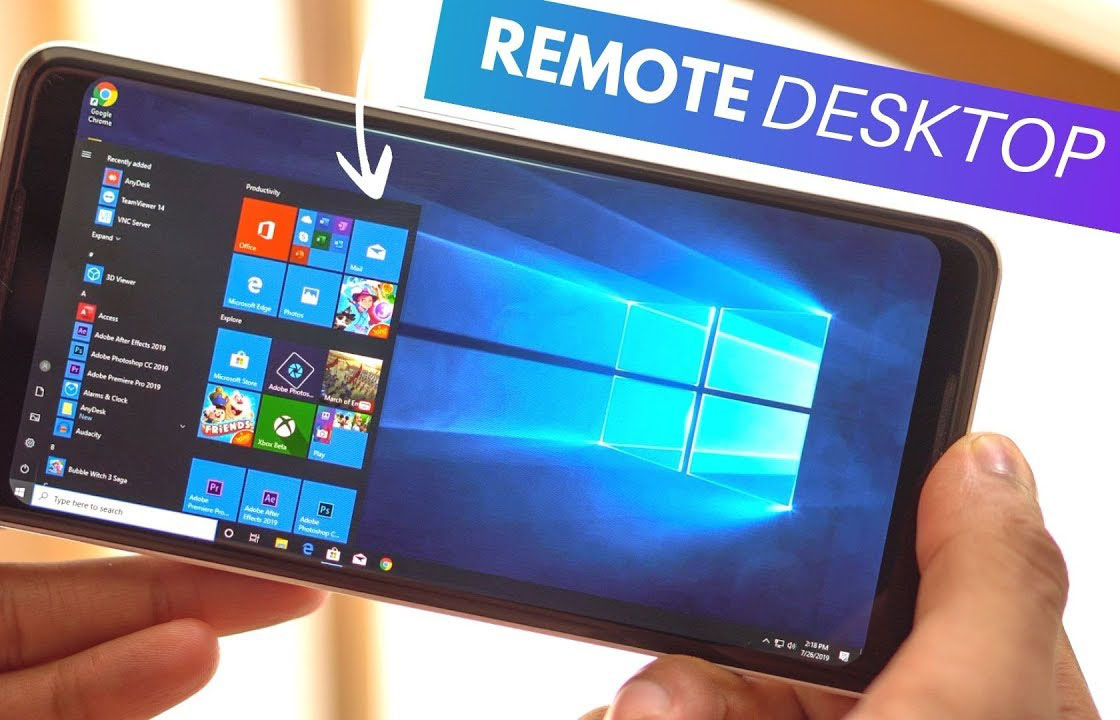
Microsoft Remote Desktop for Android: A Step-by-Step Setup Guide
Have you ever found yourself far from your Windows computer yet urgently required access to files, applications, or troubleshooting a problem? Many people experience this annoyance: forgetting an essential document, having to start a work program from home, or assisting a family member with a technical problem miles away. Often, conventional remedies call for complex configurations, questionable connections, or third-party applications endangering privacy.
Microsoft remote desktop for Android fits in there. It lets you manipulate files, apps, and settings just as if you were sitting right in front of your Windows PC, offering a safe, easy method to access it remotely. Remote Desktop keeps you consistently connected anytime, anyplace whether you are on the move handling job duties or helping loved ones from a distance.
This guide will walk you through the setup process so you may remain in charge, troubleshoot issues, and complete tasks free from desk attachment.
How to Get Started
1.Enable Remote Connections on Your PC
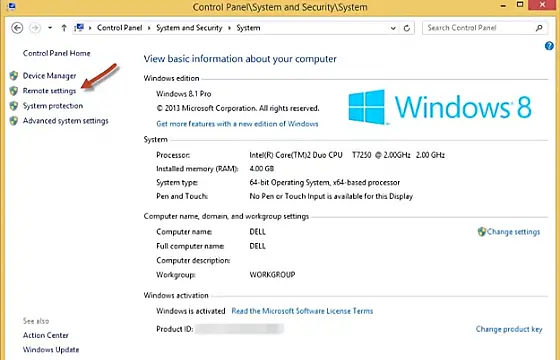
- Step 1: Access Remote Settings:
- On Windows 7 and Windows 8, go to Control Panel > System and Security > System.
- Click on “Remote settings” from the left pane.
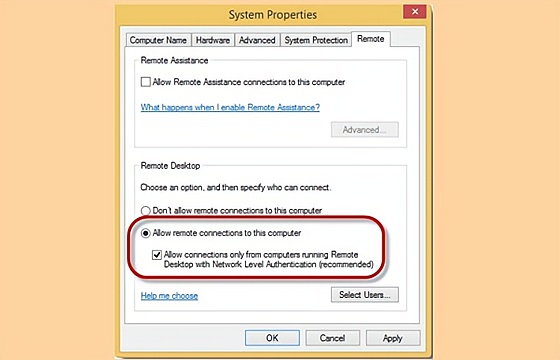
- Step 2: Allow Remote Connections:
- Under Remote Desktop, ensure that you allow remote connections to the computer and choose Network Level Authentication.
- If you have connection issues, try disabling Network Level Authentication.
- You can restrict connections to specific users by clicking the Select Users button.
2.Connect to Your PC with an Android Device
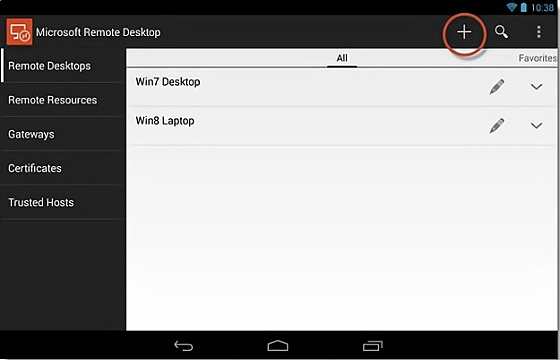
- Step 1: Add a New Connection:
- Launch the RD client and go to the Remote Desktops tab.
- Tap the “+” to add a new connection.
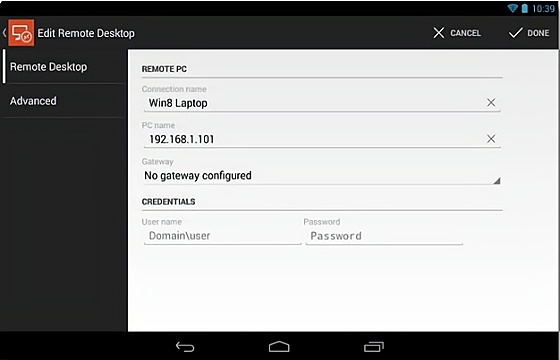
- Step 2: Enter Connection Details:
- Enter a name for the connection, the host name or IP address of the remote PC, and log-in credentials if you want them saved.
- Tap “Done” to save the connection.
- Step 3: Connect to the Remote PC:
- Tap the connection you just created.
- If prompted with an untrusted certificate, select “Trust Once” or “Trust Always” if you trust the remote PC.
- You should see the remote PC’s desktop.
RELATD:
Amazon Web Services (AWS): The Smartest Cloud Choice for Real-World Needs

3.Navigating the Remote Connection
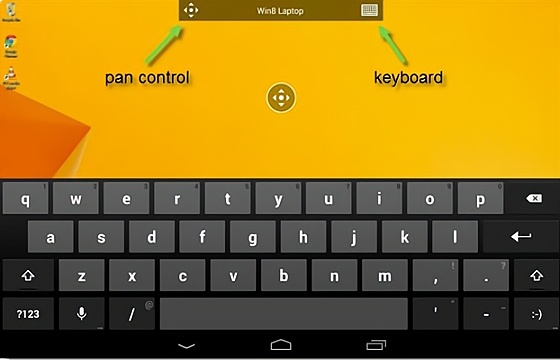
- Step 1: Connection Bar:
- The connection bar at the top has two icons: the pan icon (for zooming and moving around) and the keyboard icon (to display or hide an onscreen keyboard).
- Long press the connection bar to move it from side to side if it obstructs your view.
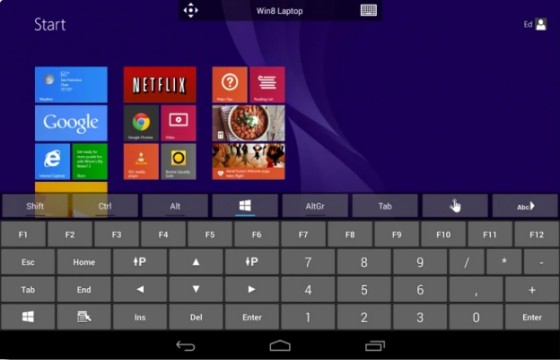
- Step 2: Utility Bar:
- Tapping the connection bar brings up the utility bar.
- You can disable multitouch and use a cursor, display modifier keys for shortcuts, and access extra keyboard keys like the F-keys.
- Double-tap the Windows key to toggle between the desktop and Start screen in Windows 8.
Disconnecting and Creating Shortcuts
1,Disconnect:
- Tap the back button on your Android device twice to disconnect.
2.Create Shortcuts:
- For frequently accessed remote PCs, create direct shortcuts using the Remote Desktop widget.
RELATED:
Google Unveils Chrome Remote Desktop Extension
Exploring Remote Work Opportunities: A Guide to Top Companies and Platforms