


Step-by-Step Guide to Curling Your Hair with a Flat Iron
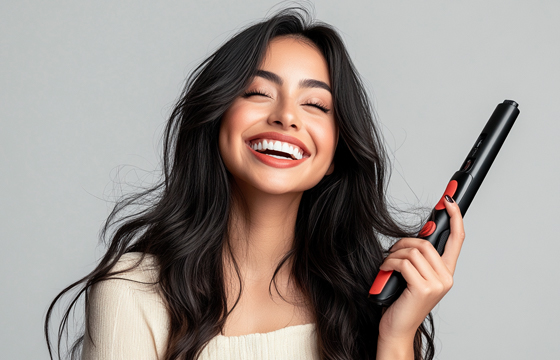
Do your bathroom or baggage only have space for one hot tool? The flat iron is capable of curling, waving, and straightening. Celebrity hairstylists actually recommend this technique for creating thick curls and waves out of straight hair, sometimes even more effectively than curling irons.
RELATED:5 Stylish and Simple Hairstyle Ideas for Short Curly Hair
However, mastering this method can be a little difficult at first, so we contacted famous hairstylists to provide a detailed tutorial on curling hair with only a flat iron.
How to Use a Flat Iron to Curl Your Hair
Celebrity hairstylists taught us two techniques for using a flat iron alone to add curl, volume, and texture.
Procedure 1
Celebrity hairstylist and Beachwaver Co. founder Sarah Potempa, who is well-known for her distinctive hair products, shared her flat iron curling method with us.
- Step 1: Prepare for Heat Styling
Excellent preparation is the foundation of all gorgeous hairstyles. Potempa suggests Beachwaver Co. Great Barrier Heat Protectant Hairspray for heat protection to guarantee that your hair stays healthy and that your hairstyles persist. "You can use it to help protect your hair and keep your styles longer at every stage of the styling process. According to Potempa, "[this] produces a protective layer against heat up to 450°F and offers flexible hold that can be layered throughout styling without making the hair crunchy or stiff."
- Step 2: Divide hair into sections
In order to achieve uniform curls, it's crucial to divide your hair into regular portions before using a flat iron. “I prefer to begin by cutting around the head, starting at the bottom and working my way up, starting from below my ears,” Potempa explains. Use a flat iron on hair after spritzing each region with a heat protectant.
- Step 3: Tip to Flat Iron Root
"Apply the flat iron to the root of a one-inch segment of hair on the right side. Rotate your wrist to control the wave away from your face as you move the flat iron down to the ends. You can spin the curl into the desired curly shape with your finger after the hair has been removed from the flat iron plates, advises Potempa.
NOTE: A flat iron with rotating plates is a good choice since the floating parts may be used to sculpt hair into curls, waves, and other styles. For all hair types, Potempa suggests the Beachwaver Coast Pro Ceramic Flat Iron.
- Step 4: Completions
Allowing the curls to completely cool before using styling products will help them linger longer. To produce silky, frizz-free waves, Potempa applies hairspray to her curls and uses a mixed bristle brush to stroke the hair throughout. You can apply a hair oil to your dry hair to smooth and moisturize it. For soft, glossy hair, try OLAPLEX No. 7 Bonding Oil on the ends of your hair.
RELATED: How to Identify Your Hair Type—and Why It’s Important
Procedure 2
Celebrity stylist and PURA D'OR partner Clyde Haygood is renowned for his iconic looks, having worked with celebrities such as Lady Gaga, Demi Lovato, and the Kardashians and Jenners for 15 years. This is how he uses a flat iron to curl hair.
- Step 1: Get Ready
"Using heat protection prior to blow-drying or using hot styling equipment is essential for maintaining hair at its best health. To guarantee adequate absorption and protection for the hair, it is recommended to apply a heat protectant prior to applying any other product," advises Haygood. He recommends PURA D'OR Argan Oil Heat Shield to smooth and detangle hair while providing protection from intense heat. Comb through wet hair from root to tip after applying the heat protectant immediately to it.
- Step 2: Section Your Hair Before Flat Ironing
Make sure your hair is fully dry before starting. Haygood suggests dividing your hair into four sections—top, two sides, and back—using clips. This makes it easier to manage each section and helps control how much curl and volume you achieve.
To curl, clamp the flat iron about an inch from the roots, then rotate the iron a full 360 degrees away from your face. Slowly pull the iron down to the ends of your hair. Once you finish the back section, move on to the sides and top, repeating the same technique. For extra volume, alternate curling sections forward and backward as you go.
Haygood recommends using a one-inch flat iron with smooth, rounded edges to prevent dents in your hair. He also prefers ceramic-plated flat irons because they heat evenly and are gentler on the hair.
- Step 3: Secure Hair
After that, twist the flat ironed piece with your fingers to allow the curl to solidify. "To set and prolong the hair, the cooling process is just as crucial as the heat. For a natural look, let all of the hair cool down to thoroughly set before using your fingers to rake over the curls, advises Haygood.
- Step 4: Completions
Apply texture spray and hairspray to achieve the desired finish. "The style will hold and last for a few days at the very least if you use a hairspray or hot tool spray. According to Haygood, "texture spray adds thickness, volume, and hold for a tousled natural look."
Expert advice: Don't give up if it doesn't work out the first time; it takes a few tries to master the coordination of this technique. According to Haygood, the goal of flat iron curling is to give the hair body, waves, and movement, not to achieve flawless curls.